Before You Begin
The Background
We largely followed the step-by-step lab procedures for injectable estrogen from HRT Cafe, while also referencing a recipe we found in the International Journal of Pharmaceutical Compounding. The process of producing a usable form of estrogen is pretty straightforward. That being said we strongly encourage you to poke around and learn as much as you can on this topic. None of us are experts and we would all benefit from learning from each other. Furthermore, the way we chose to go about this is not the only way. We could have also bought a pill press and a binding agent and cranked out estradiol pills that could be taken orally (although we understand that buying a pill press is a very easy way to attract unwanted legal attention). We have also produced topical estrogen. We could have looked into making blockers. Each approach has its strengths and weaknesses and in the end the correct approach is the one you and your friends are most excited about pursuing.
We’ve broken this section down into 5 parts: project infrastructure, first steps, ordering materials, making a batch, and distribution. Each section includes a general idea of what to do in bold followed by detailed instructions and notes.
We purchased 250 grams of raw estradiol powder (enough to make 6250mL of 40mg/mL finished solution), and proportionate amounts of the other ingredients, but the recipe below is for a 400mL batch. We were limited by the size of our workspace, which comfortably fits four people at once with a table and lab equipment. In our experience 400mL is a volume that four people can reasonably make and filter in a day. If you have a different size work space and more or fewer people helping you may wish to scale the recipe up or down.
Project Infrastructure
The first step in this, or any project is to get together with your friends and comrades and see who would like to help make it a reality. If you don’t have a network of trusted friends that are interested in helping try going to the closest anarchist bookstore or community center and see what projects you can help out with. Hopefully you will develop friendships and camaraderie with people through working together on shared projects. If all goes well eventually DIY estrogen can be one of the projects you all can add to your repertoire!
Before/during/after starting a DIY estrogen project we would love it if you please send an email to mablesbakerymutualaid@proton.me! We would love to help in any way we can and learn from each other’s experience. If nothing else it’ll be nice to be in touch with other people working on the same project. In addition, if you come across any helpful materials we can include them on this site or in the public cryptpad repository.
To work on this project on your computer we recommend that you get a Tails stick. This is a USB flash drive with the Tails operating system installed on it. Tails is a highly secure operating system that only connects to the internet via the Tor network and saves absolutely nothing to your hard disk. To download a copy of Tails have a friend that already has a Tails stick clone it. If you don’t know anyone with Tails you can download it and read a full set of instructions at tails.boum.org. If this process seems overwhelming find a computer savvy friend to help you. Once this is done start your computer running tails and create an email account with which to contact vendors. It is strongly recommend that you only sign in to this email or anything else that directly relates to your DIY estrogen project from within Tails. Remember that Tails and Tor are not magic. If you sign into your personal email account at the same time as you sign in to your DIY estrogen email you will have associated the two. So, ONLY work on one project at a time when using Tails.
To prepare for ordering and receiving shipments get together with your friends and find out how you will receive packages anonymously. The easiest way would be to get a friend that isn’t directly involved in the project to receive the package for you. Ship it to them under their own name and then pick it up from them once it’s arrived. Receiving packages on behalf of this project is a great way for people to help the project while limiting their involvement. Other ideas include getting packages shipped to a friendly community center, or shipping to your own houses if the packages are spread out. For example maybe one person will order the benzyl alcohol and have it shipped to themselves and another person will order the benzyl benzoate, still a third person will order and receive the MCT oil. Doing it in this way reduces the chances that any investigation will be able to determine the pattern of purchases. If someone is receiving a package it’s usually best that they pay for the package using their own payment methods and then you give them cash reimbursement. Some people can receive multiple packages if the things they’re receiving are especially not sketchy, such as scales and glass jars. With all of this in mind, you should always try to reduce online purchases as much as possible. Wherever possible try to buy things with cash in person. Do you need to buy glass overflow jars online or can you get them from a thrift store with cash?
Like all projects you will need an amount of money and/or resources to get started. Fundraise discreetly among friends to get the necessary money. We spent about $1000 on lab equipment (the things we only had to buy once and can continue reusing) and about $3100 on the consumable materials. This pencils out to about $3 per 7mL vial (not including the cost of the reusable equipment), which can last 3-6 months per person depending on dosing.
If you’re able to we absolutely recommend trying to raise more than $4100 to allow for fuck ups and unexpected problems. This money should be kept as cash in a secure location and should be well accounted for. Keep track of how much money goes in and how much has been spent on each item. This is mostly so you can see how much money you have left for things as well as where you can try to reduce expenses in the future, in addition to transparency.
Your operation will also need a physical location to operate out of. An empty bedroom is big enough, though we don’t recommend using a bedroom that anyone lives in. This is because this project requires a fairly large amount of stuff and it would be difficult to store everything in a room that’s already filled with someone’s personal possessions. You should also think about security here: wherever the project is based out of should be secure. We recommend finding a friend who lives alone with a spare room or a friendly community center that is willing to rent a room to a member of the project. Do not mention DIY estrogen officially, just rent it as a personal room. Draft a lease that stipulates that your room is not to be entered into without your permission and leave a lock on the door. This both protects you and the community center. The community center is protected because in the event you get busted they have a lease to provide legal cover: they as landlords are not responsible for what their tenants do. For extra security you may wish to store different materials in different locations – glassware and lab equipment somewhere other than the raw estrogen, for example.
Create a cryptpad spreadsheet to keep track of your finances. This includes managing your money and keeping track of any and all prepaid cards. Make sure to keep track of any/all of these cards, including where they are, how much is on them, what they’ve been used for so far, and the billing information attached to them. For example if a website requires you to put in a billing address for the card make sure you write down which billing address has been used for which cards. This is to prevent the card from getting rejected due to using contradictory information.
Finally, a note on formatting. For the rest of this section we’ve provided detailed step by step instructions on how to produce and distribute hundreds of years worth of estrogen. For each section there are numbered points that say in bold the simple version of what to do. If you want to learn how to do things on your own you can simply follow those points and try to figure it out from there. If you’d like more info we’ve included bulleted notes on how exactly to do this. We’ve also tried to include how much to budget for each item, but prices may change drastically in the time between writing this zine and you making your own purchases. As always, do not assume that we’re especially smart or know the best way to do things. We don’t. In fact we greatly look forward to receiving emails from people saying things like, “why did you do X like this? You could have done Y thing instead and it’s so much easier/faster/cheaper!” So please experiment, learn more than us and then let us know how you did it!
Ordering Materials
Purchase and test estrogen. Cost: $400-$1500 ($0-$500 for the test. At the time of writing this zine we are seeing raw estradiol valerate powder for approximately $5/gram and the price continues to fluctuate, so we actually have no idea what it might cost you when you read this).
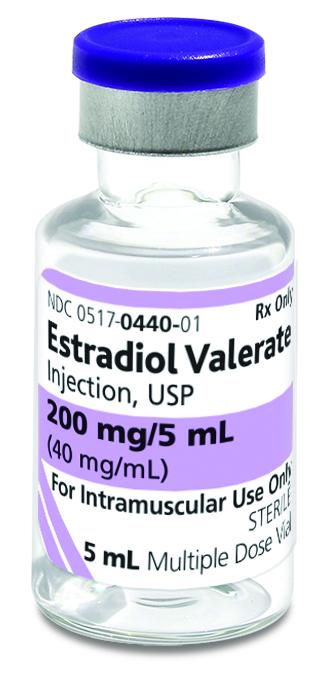
We bought 250 grams of estradiol valerate. Make sure you get specifically estradiol valerate. If you wish use a different form of estrogen you’ll need to look up different recipes for that variant. There are lots of black market websites that sell estrogen, and there are lots of bodybuilder forums where people discuss the best vendors from which to purchase – they often sell feminizing hormones in addition to masculinizing hormones. We recommend spending some time on these bodybuilder forums – try searching “bodybuilder forum” on Duck Duck Go. You may need to create an account to see full discussion threads. Check recent reviews for specific vendors. Some forums forbid the discussion of illegal sourcing. You can also check transfem message boards for vendor recommendations. You will likely need to make an account on the vendor’s website. There may be an option to pay with crypto in browser, or you may receive an invoice via email. Pay with cryptocurrency and make sure that the bitcoin itself was bought in a manner that can’t be traced (e.g. with cash), or was appropriately tumbled. If you’re unfamiliar with this process, ask a tech-literate friend to show you (be aware that this is somewhat tedious and requires lots of time waiting for crypto transactions to slowly process over tor). Cryptocurrency isn’t inherently anonymous but with some extra steps to tumble it you can ensure your online purchase is pretty privacy-minded.
It can take a month or more for your estrogen to arrive, especially if you ordered from an international source. Be patient. It may arrive in packaging that is not labeled as estrogen. This is normal.
Once your estrogen arrives you will need to test it. This step is second because if the test doesn’t come back clean (e.g. they sold you a bunch of baking soda) you will need to repeat the previous step before proceeding further. Go to toxassociates.com. Order a comprehensive drug analysis, tell them you want a quantitative analysis of estradiol valerate and a test for heavy metals. This is a step where multiple DIY hormone crews can work together and save a lot of money. Assuming multiple chapters place an order of estrogen together only a single test will need to be performed for everyone. Thus, the costs for testing will be split between however many chapters go in on the order together. Pay for the test with a money order purchased with cash and await your results. You’re looking for the results to ideally say >99% estrogen and no heavy metals or anything else detected. If you live somewhere that has an anonymous harm reduction drug checking service, this is a great alternative option – this is what we did. We found a free one that provided instant results via FTIR testing and a second round of results about a month later via GCMS. You can find a directory of North American drug checking programs at https://harmreductionlab.com/drug-checking-directory-1. We owe a great debt to the decades of struggle by drug users for decriminalization and access to harm reduction supplies and services!
Purchase Ingredients:
1 gallon of MCT oil USP. Cost: $60-$110.
You can buy bulk MCT oil online from laballey.com and various other vendors. Make sure it is USP grade. We used coconut-based MCT oil rather than cottonseed oil after hearing of multiple people experiencing allergic reactions to cottonseed oil. Some people are allergic to coconut as well so we made sure to note on the finished vials that they contain coconut-derived ingredients. It’s up to you whether you want to use MCT oil, cottonseed oil, or castor oil — see the information on filters further on for compatibility of specific oils. We also found the MCT-based estrogen to be runnier than our prescribed cottonseed-based hormones and therefore easier to draw up and inject. Castor oil is EXTREMELY thick and time-consuming to filter; we don’t recommend it unless you’re unable to source any filters other than PVDF filters.
500mL of benzyl alcohol USP. Cost: $31.
Benzyl alcohol is a very common chemical and can be found from a number of websites like Med Lab Supply.
USP stands for United States Pharmacopoeia and refers to a standard of purity for chemicals. All chemicals should be sold to you as USP. If you have the money you may wish to send all of your reagents off for testing in addition to the estrogen. We did not test our chemicals other than the estrogen.
500mL of benzyl benzoate USP. Cost: $16.
Follow the steps for benzyl alcohol but with benzyl benzoate.
½ to 1 gallon Isopropyl Alcohol 99%. Cost: $25
Do NOT use “technical grade” isopropyl alcohol. It can leave an oily residue and contaminate your HRT!
Note: You don’t need to buy such a large amount for this tutorial.
We use 99% IPA because it is better at dissolving grease and grime which may be present on surfaces, sterilization of surfaces is done via autoclaving or by using presterilized components. For wiping down gloves you should use sterile alcohol swabs which contain 70% alcohol.
Purchase Supplies/Tools
Desiccant packs. Cost: $10
This will absorb any moisture that gets into your package of raw powder and is especially helpful if you don’t use all your raw powder at once.
18g Leur Lock Needles – box of 100. Cost: $8.
In some states you can easily purchase these online without any kind of medical license. You can also buy them from veterinary medicine websites. We like the kind with the “leur lock” fitting for the needles.
30mL Sterile Syringes – box of 100. Cost: $42.
Same purchasing process as the 18g leur lock needles.
Pre-sterilized Vials. Cost: $407 for 370 vials.
Smaller vials are less likely to get contaminated or cored from multiple reuses. We went with 7mL vials, and we don’t recommend any larger than 10mL vials.
You can divide the total volume of estrogen you intend to make by the volume of the vials you choose to determine how many vials to order. In our case we got 370 of the 7mL vials.
Tip: amber vs. clear vials: Clear vials are easier to inspect for particulates or discoloration of the vial contents. Amber vials protect their contents from light making it less likely to degrade, but you won’t be able to check for discoloration prior to drawing.
Syringe or Bottle-Top Filters (0.22 µm sterile). Choose one option:
Option A — Nylon Sterile 0.22 µm Syringe Filters. Cost: $75.98 for 12. Only use Nylon syringe filters if your chosen carrier oil is MCT oil; other filter membranes are less compatible for our purposes and could dissolve into your medication. They must be individually packaged and sterile. Only use 0.22 µm or 0.2 µm filters, nothing larger or smaller.
Option B — Nylon 250mL Sterile 0.22 µm Bottle-Top Filters with included media bottles. Cost: $75.98 for 12. Use these if you’re using MCT oil and want to do large batches without the time and energy commitment of syringe filtration.
Option C — PVDF 250mL Sterile 0.22 µm Bottle-Top Filters with included media bottles. Cost: $146 for 18. Use these if you’re using castor oil. They will save you the physical exertion of syringe filtration but take a very long time (6+ hours per 250mL). We only used castor oil and PVDF filters when nylon filters were unavailable, which precluded us from using MCT oil.
Weight boats. Cost: $16.
Lab spatulas. Cost: $10
AWS Gemini 20 Milligram Scale: $35
Magnetic Stir Bars. Cost: $10
Glass beakers. Cost: $15-$50
We will use the 100mL and 500 mL ones. A few of each.
Magnetic stirring hot plate. Cost: $200
Buy the 380 °C version that comes with a temperature probe.
Squeeze bottles. Cost: $17
Instant Pot Pro Plus. Cost: $200
Do NOT use a regular Instant Pot. It must be a 15 psi pressure cooker. A stovetop pressure cooker that can reach 15 psi is also a good option. A regular Instant Pot can potentially work but you would need to run the sterilization cycle for at least 2.5 hours instead of 1 hour. If you have an Instant Pot Max (discontinued), that works too.
Instant Pot Mesh Steamer. Cost: $27
Optional. Nice for keeping vials higher up in the Instant Pot. You can use a canning rack, however for vials you will need something else to support them. Don’t let the vials touch the bottom of the Instant Pot.
20mm Vial Crimper. Cost: $40
Still Air Box. Cost: $34
Paper towels.
Get a handful of rolls of disposable shop towels from a hardware store or automotive store – these shed less fibers than regular paper towels.
Clean room tape (2 rolls). Cost: $30-$100.
Polyethylene is the higher quality option but much more expensive. PVC can work and is way cheaper but is stiffer/more annoying to work with.
6mm clear plastic sheeting (100 ft by 10 ft). Cost: $53
Zip Ties
Zipper door. Cost: $25
20″ x 20″ Box fan. Cost: $25.
20″ x 20″ MERV 13 Air filter. Cost: $35.
Tyvek painters suits (one per person). Cost: $10-$25 each.
Joanlab 10mL/min vacuum pump. Cost: $160.
Buy this if you intend to do bottle-top filtration instead of syringe filtration.
Vial Decapper. Cost: $35.
Used to remove caps from pre-sterilized vials. Don’t pierce the stoppers on pre-sterilized vials as it is unsafe to autoclave them after doing that.
Build your “cleaner” room
You can build a positive pressure “cleaner” room with materials commonly found at the hardware store while you’re waiting for the raw estrogen and other supplies to arrive in the mail. Set aside a full day for building the room. A “cleaner” room is essentially a plastic cube/bubble with all seams sealed with clean room tape and filtered air getting blown in. The first bubble we built was just one big room. After the first handful of batches we reassessed, took down the first bubble, and rebuilt it with an intermediary room in which to change into our Tyvek suits which never leave the bubble. After making the first few batches we got a better idea of what kind of layout would work best for our process. We taped a HEPA filter to the outside of a box fan, and patched in the fan to the wall of the workspace room in the bubble. So filtered air gets blown directly into the work room, pushed out into the changing room, and finally from the changing room to the outside. We aren’t under the illusion that we can completely eliminate the introduction of all dust or outside contaminants into the bubble but the cleaner room is part of a multi-pronged approach to safety. In combination with testing the raw material, using a preservative, filtering the solution, and steam sterilizing the final product, a cleaner room reduces the likelihood of dust, bacteria, and other contaminants ending up in the estrogen.
Check out the video “I Built a Positive Pressure Clean Room for Cheap” on youtube for a guide. If your cleaner room is intended to be temporary you might not necessarily need to build the wooden frame and can use plastic zipper doors.
Baking
Overview
The basics of making girl juice are as follows: measure out all of the raw materials by mass, add them to a mixing container, heat and mix vigorously, filter into vials, and sterilize the vials in the pressure cooker. Based on our experience the most tedious part of this process is filtering into the vials – this took much longer than actually making the batch itself. The process is actually pretty straightforward, it just takes a while to filter. You should clear your afternoon for this and plan on it taking about 4 hours. You might also want to start with a smaller batch, like 100mL, just to get familiar with all the parts of the procedure. Keep in mind that this process will likely be messy and will involve some amount of estrogen solution spilling over your work environment. You should clean up as you go. Having paper towels and isopropyl alcohol on hand is helpful. You should also not work by open windows where a passerby will see what you’re doing. It will look like you’re making drugs and will attract unwanted attention.
Rinse all your lab equipment with isopropyl alcohol:
You can put the IPA in a squeeze bottle for easy rinsing the glassware.
Use alcohol-dampened paper towels to clean your work table, scale, magnetic stirring hot plate etc.
Allow all the equipment to dry. A (new, dedicated, sanitized) dish rack is helpful for drying the glassware.
Set up your magnetic stirring hotplate:
You will want to familiarize yourself with the hotplate and how to set/adjust its settings before you make your first batch.
Set the hotplate to 45 degrees C.
Measure out 100ml of MCT oil:
Place a 1000mL glass beaker on the magnetic stirring hot plate with a stir bar in the bottom.
Using a 100mL glass beaker, measure out 100mL of MCT oil and pour it into the 1000mL beaker.
Adjust the height of the temp probe so it is in the oil and not touching the sides or the bottom of the beaker. Adjust the stir speed as fast as it will go without the magnet spinning out.
Measure out 16 grams of estrogen powder.
Slowly pour 16 grams of estrogen onto the weight boat with the help of a lab spatula. Break up any big clumps with the spatula.
Pour the estrogen from the weigh boat into the MCT oil. It will be very clumpy at first. Continue letting the oil stir.
Measure out 180g of benzyl benzoate.
Place a 100mL glass beaker on the scale and tare it.
Measure out 100 grams of benzyl benzoate, then another 80 grams, and pour it into the oil/estrogen solution. Use a little of the benzyl benzoate to wash out the weight boat used to measure out the estrogen, to minimize waste.
Continue allowing the oil/estrogen/benzyl benzoate to stir until the estrogen dissolves completely. Monitor the temperature to keep it between 40 and 60 degrees C. The dissolving step can take upwards of 20 minutes.
Turn off the heat and allow the solution to cool below 40 degrees C
Add 8 grams of benzyl alcohol to the 1000 mL glass beaker.
Do not add the alcohol until the solution has cooled below 40 degrees C.
Stir the alcohol into the solution for about 15 minutes.
Bringing Up to Final Volume:
If the total volume of the solution is less than 400 mL, slowly add more MCT oil to the solution in the 1000 mL glass beaker until the total volume of solution is 400 mL.
Stir the solution for another 10-15 minutes.
Uncapping Sterile Vials:
Remove the plastic top from the pre-sterilized vials.
Use the vial decapper to gently but firmly grip on the top of the vial seal. Go slowly and pull up gently rotating around the vial without fully removing the metal seal.
Once the seal is uncrimped all around, use a pointed object, such as the cap for a needle, to push down on the stopper to prevent it being removed along with the seal. Pull up gently to remove the metal seal only.
You may want to wipe metal dust off the top of the vial stopper with an alcohol wipe if there is any after removing the seal ring.
Filtering:
Option A: Syringe Filtering
Filtering HRT takes about a minute per mL filtered! If you want to filter 30 mL vials, it means you will be pressing on a syringe plunger for about 30 minutes. This method produces 55-60 vials depending on how precisely you filter 7mL per vial.
Grab one of the 30mL or 60mL syringes and fit an 18g drawing needle onto it.
Draw up the solution out of the beaker.
Remove the 18g needle. Do not re-use this needle in the next part.
Obtain another new 18g needle.
Unwrap a syringe filter and place the needle on the output side (luer slip side) of the syringe filter.
Install the syringe filter onto your syringe.
Pull up the stopper on an uncapped sterile vial just enough that you can fit the needle between the wall of the vial and the stopper. Press down on the stopper to hold it against the needle and avoid dust getting in.
Be careful not to scrape the side of the vial with the needle.
Fill up the vial and pull the needle out, making sure to push the stopper back down. Set the vial aside and repeat for as many vials as you want to fill.
Place an aluminum vial cap over the vial.
Position the vial crimper over the vial evenly.
Squeeze the vial crimper, first with one hand and then two hands.
Repeat the steps to cap the rest of the vials.
Option B: Bottle-Top Filtering
Bottle-top filtering is significantly faster than syringe filtering. If you are brewing more than a small amount for personal use we strongly recommend this method.
Open the pre-sealed plastic bag containing the bottle-top filter and media bottle.
Connect the vacuum hose from the pump to the vacuum filter.
Pour in all of the estrogen solution from the beaker into the filter and place the cap back on the filter.
Turn on the vacuum pump.
The solution will start filtering drip by drip. When the drips stop happening after a minute, it is safe to assume you are done.
Remove the bottle-top filter from the media bottle.
Use either a syringe with an 18 gauge needle (but not a syringe filter) or micropipettes to fill the individual 7mL vials with the finished solution, and cap the vials as outlined in the syringe filtering instructions above.
Terminal Sterilization:
Fill the Instant Pot Pro Plus up with 2 cups of water.
Place both mesh steaming baskets or the canning rack and something to support the vials into the Instant Pot Pro Plus. Do not let the vials touch the bottom of the instant pot.
Place all of the vials into the top basket of the Instant Pot Pro Plus.
Run the instant pot on the canning cycle for 1 hour, at max pressure, with no venting (natural cooldown), and no keep warm.
It should reach a temperature of 250 °F. Allow the pot to cool naturally. If you vent it, it will put more temperature stress on the vials.
Inspection and Labeling:
Give your vials some time to allow air bubbles to dissipate and look for evidence of dust contamination. If the vials are contaminated, you should consider refiltering and investigating how your vials were contaminated. You should also label your vials with their ingredients, a batch number, and an expiration date after determining the vials pass a visual inspection.
You should record the batch numbers of any oils and excipients used along with the batch number in a compounding log. Castor oil solutions can last for 2-5 years and MCT oil solutions can last 3-8 years from the date of manufacture for the oil. The higher numbers are theoretical, require ideal storage, and exceed recommended use times for the oil by the manufacturer. Vials should be stored in a dark place free of excessive heat, as light and excessive heat exposure speed up degradation. If you freeze your vials in an attempt to extend shelf life, you may need to place them into boiling water to re-dissolve any API which precipitates out.
Clean Up Your Workspace:
Once you are done making all of the estrogen you should clean up your work area. Tear off all of the labels of the packages you received and burn them. This is to prevent you from putting a bunch of incriminating evidence into the same dumpster. Once all of the labels have been disposed of you can dispose of the boxes as regular recycling. If you peel the labels off the chemicals you bought you can also dispose of them as normal recycling. If not, dispose of each one in separate dumpsters.
Pour any remaining overflow containers back into their original bottles. Thoroughly wash all non-disposable lab equipment. Return all of your supplies to wherever you normally store them. For a 400mL batch filtered into 7mL vials, you should have about 57 vials filled.
Distribution
Print zines.
We based this zine off the zine that Fairy Wings Mutual Aid designed for transdermal estrogen and made a bunch of edits for the specific hormone you’re making. You can do this too, change out the contact info and any other relevant details, and print your own edition. Make sure to change the title of the zine to “[Your chapter’s name] 1st edition” or something other than the title of this zine, so as to not confuse people. An electronic copy of the Fairy Wings zine for editing can be found at https://tinyurl.com/boobsnotbombs. If you’d like an electronic copy of the Mable’s Bakery Mutual Aid DIY testosterone zine for editing send an email to mablesbakerymutualaid@proton.me.
Given the length of this zine printing will be very expensive. We recommend you find someone with a free/cheap printing hook up. As a suggestion look up the closest zine distro and ask them. If you don’t know any zine distros or this won’t work for whatever reason send us an email and we’ll try to help you out.
Create a distribution network.
Seek out places (especially public/easily accessible places) where you could leave a hormone drop-off/pick-up station. The station itself will consist of a number of bottles, an equal number of zines, and a donation jar. The specifics of what locations to pick are of course up to you. If you’d prefer a more clandestine arrangement you could also keep the bottles yourself and distribute them through word of mouth only. If you’re okay with a more public arrangement you could advertise online and mail the bottles out. If you’d like to go this route we recommend you contact hrtcafe.net and see if your small operation can be listed on the website.
Other places that can serve as distribution points are Really Really Free Markets, Food Not Bombs servings, art spaces, an anywhere frequented by people that would like estrogen and ordinarily would not have access to it. Of particular interest currently are places (such as Republican controlled states) that are making it increasingly difficult or impossible for minors to access hormones. If this isn’t feasible for you that’s okay too. The main criteria is that you pick a plan that you and your friends are excited about and go from there!
If you opt for a physical distribution plan make sure to periodically check the places that you all have left bottles to see when they need more. As a suggestion when you drop off more bottles you can also pick up any donations from the donation jar. Make sure to record any income in your finance spreadsheet, as always.
The initial goal for Fairy Wings was to spread out pretty far to try to get as many people interested as possible. In the long term their hope is that other projects will come online and they will be able to shrink their network because that’s just what makes the most logistical sense.
Distribute Bottles.
Once you know where to take the bottles/zines physically transport them to all of the various locations. You can mail them if you like however it will be quite expensive give that the package(s) will be rather heavy. If you ship any of the bottles make sure to add wrapping so they don’t shatter in transit.
If you’re distributing at physical locations you might need to setup a station with bottles, zines, and a donation jar. This might necessitate buying a folding table for each location or figuring out some other arrangement. For a donation jar we recommend making one by cutting an opening in an old coffee container lid and writing “$10 suggested donation” or “donations” in large visible letters on it.
Once you have run out of bottles and zines, collect a final round of donations, conduct any additional fundraising (if necessary) and then start all over.